Showing posts with label bargain. Show all posts

Friday, September 10, 2010

Upcycled Transformation


Every fall our chuch has it annual parish festival. It is our biggest fundraiser of the year, and it is next Saturday.

Many years ago I started a "silent auction" as part of this event.  Calling local businesses and other parishioners asking for donations and organizing the entire event.  I am no longer in charge of it (by choice!) but I always dontate something to it, 

Here is my donation for this year...


It started out as these bits and pieces... 

... an old school desk that was originally in our parish school.  The school sold these for $5 each a few years back.  My neighbor was done with hers, she put it in her trash - and I took it! 

I am not too proud to take something out of the trash for a good cause!


... this stool, that I picked up at a local thrift store for $1 yesterday.  It was covered in rust and quite dirty, but I saw it had potential as a chair for my little desk.


... metal desk accessories, I found at Dollar Tree for... you guessed it... $1 each.


... some regular yellow pencils I covered with oragami paper (had both of those things too!) based on this tutorial I found Omiyage's blog (you can check it out here) ...


... some cute school supplies,
... a couple cans of spray paint (half of which I already had in my stash!)...


... some buttons and magnets (once again, I already had these too!) to use to hang paper and what-not from the metal sides of the desk...

... some ric rac around the bottom of the legs (had it)...


 ... and some fabric and batting (guess what... I had those already too!)...


Total out of pocket cost for this project:  $19!

I think it turned out quite cute!  

I hope that it will find a home and bring in some much needed cash to our church and school!  

 
What little girl wouldn't love doing her homework at this?

Wednesday, September 8, 2010

What to do, What to do?

I currently have an etsy shop where I sell some of my handmade items, and more recently some vintage items I have picked up here and there while "junking", "thrifting", "garage-saling"...  This portion of my shop has done much better than my handmade creations, and I think I have finally found my niche. 

I have recently been thinking about opening a physical resale shop.  However, that takes more time and money then I have to invest right now.  So I am not thinking about renting some booth space at an antique mall to sell some of my treasures. 

I would love input anyone has done this - pros, cons, costs, what would you do differently, what worked, etc...

Thank you for sharing your secrets with me!

Friday, May 7, 2010

Purging...

I am the thrift store queen.  I love scouring all my favorite stores and garage sales and finding a diamond in the rough or forgotten treasure that others have cast away.  


That being said, I have accumulated a lot of "stuff" - all of which were great bargains but a lot of them are now just taking up space.
But I am trying to reduce the clutter in my house and part with things that I don't want, or need any longer. 


So I have been listing some of my vintage treasures in  my Etsy Store.  Truth be told, I have also purchased a few solely for listing on my site!


If you are looking for something in particular, send me an email with a description of it (pictures are helpful too) and I will see if I can find it for you!

These and many more treasures can all be found on my Etsy Store - please stop by and take a look!

Tuesday, April 27, 2010

Blue Canning Jars


I love old blue canning jars.  Ball, Atlas, Ideal, Mason, doesn't really matter the brand or the age.  Most of mine are Ball jars - probably because they are the most common, and I live in Indiana (the Ball factory was in Muncie, IN).   I just love the color and the functionality of them.  I started collecting them a few years back, all bought from garage sales and thrift stores.  I think the most I have paid for any one is about $2; most were bought for less than $0.50 each.

 I don't collect them because of any real value they may have or with the plans of selling them and making big money in the future.  I collect them because I like them and I use them.


I use them as display pieces...

I use them to store things...
I have one I use as a table lamp...
... and even used 3 of them to make a chandelier for our home office...

I probably have about 30 of them and have often wondered about the different marking on them.

So just for fun, I bought this book recently...
1000 Fruit Jars
It has drawings of all the different canning jar markings, descriptions, and estimated values (as of 2007 I believe). 
It has been fun looking at all my jars and figuring out which ones are worth what.  I won't get rich on my collection should I tire of it and decide to sell (most are worth about $3, a few are worth $10, and I have 2 worth about $35 each),  but the book is fun and interesting.

If you have a canning jar collection or are thinking of starting one, it is definitely worth the $6 as a handy reference guide.  I even picked up an extra copy for my "junking buddy" Lori at Fresh Picked Whimsy.  I think I probably scored 1/3 of them with her one day when she and her family were visiting at the lake and we went to a barn sale.  They had boxes of them and were selling them for $0.50 each!  But SHHHH  don't tell her I got her a copy - its a surprise!

Friday, March 26, 2010

Some Snippets from our Office Re-Do...

We (hubby and I) have been working on re-doing our dining room/home office for the past month or so.  As with every home improvement project we undertake - it is taking longer than we had hoped for or anticipated.

But wanted to show you some of the things we have accomplished in this time... (but please ignore all the mess in the background of these pictures... most if not all of what you can see will be gone when the room is done.  Also ignore the poor quality of the pictures - I had to use my cell to take the pictures - couldn't find my real camera right now!!!)...
This is the worktable for the center of the room.  It will double as a dining table when needed for that purpose (about 3 times a year if we're lucky!).  The size is a generous 3' wide by 7 ' long!  The bases are 4 file cabinets we bought and assembled that I blogged about here.  The design for this worktable has changed slightly, but the concept is still the same.   The table top is so solid - it has (5) 2" x 4"'s running the length of the table as support, and the apron/trim piece we added to hide all that allows the top to sit over the file cabinet bases so it doesn't slide off and keeps the 2 "back to back" file cabinets together.

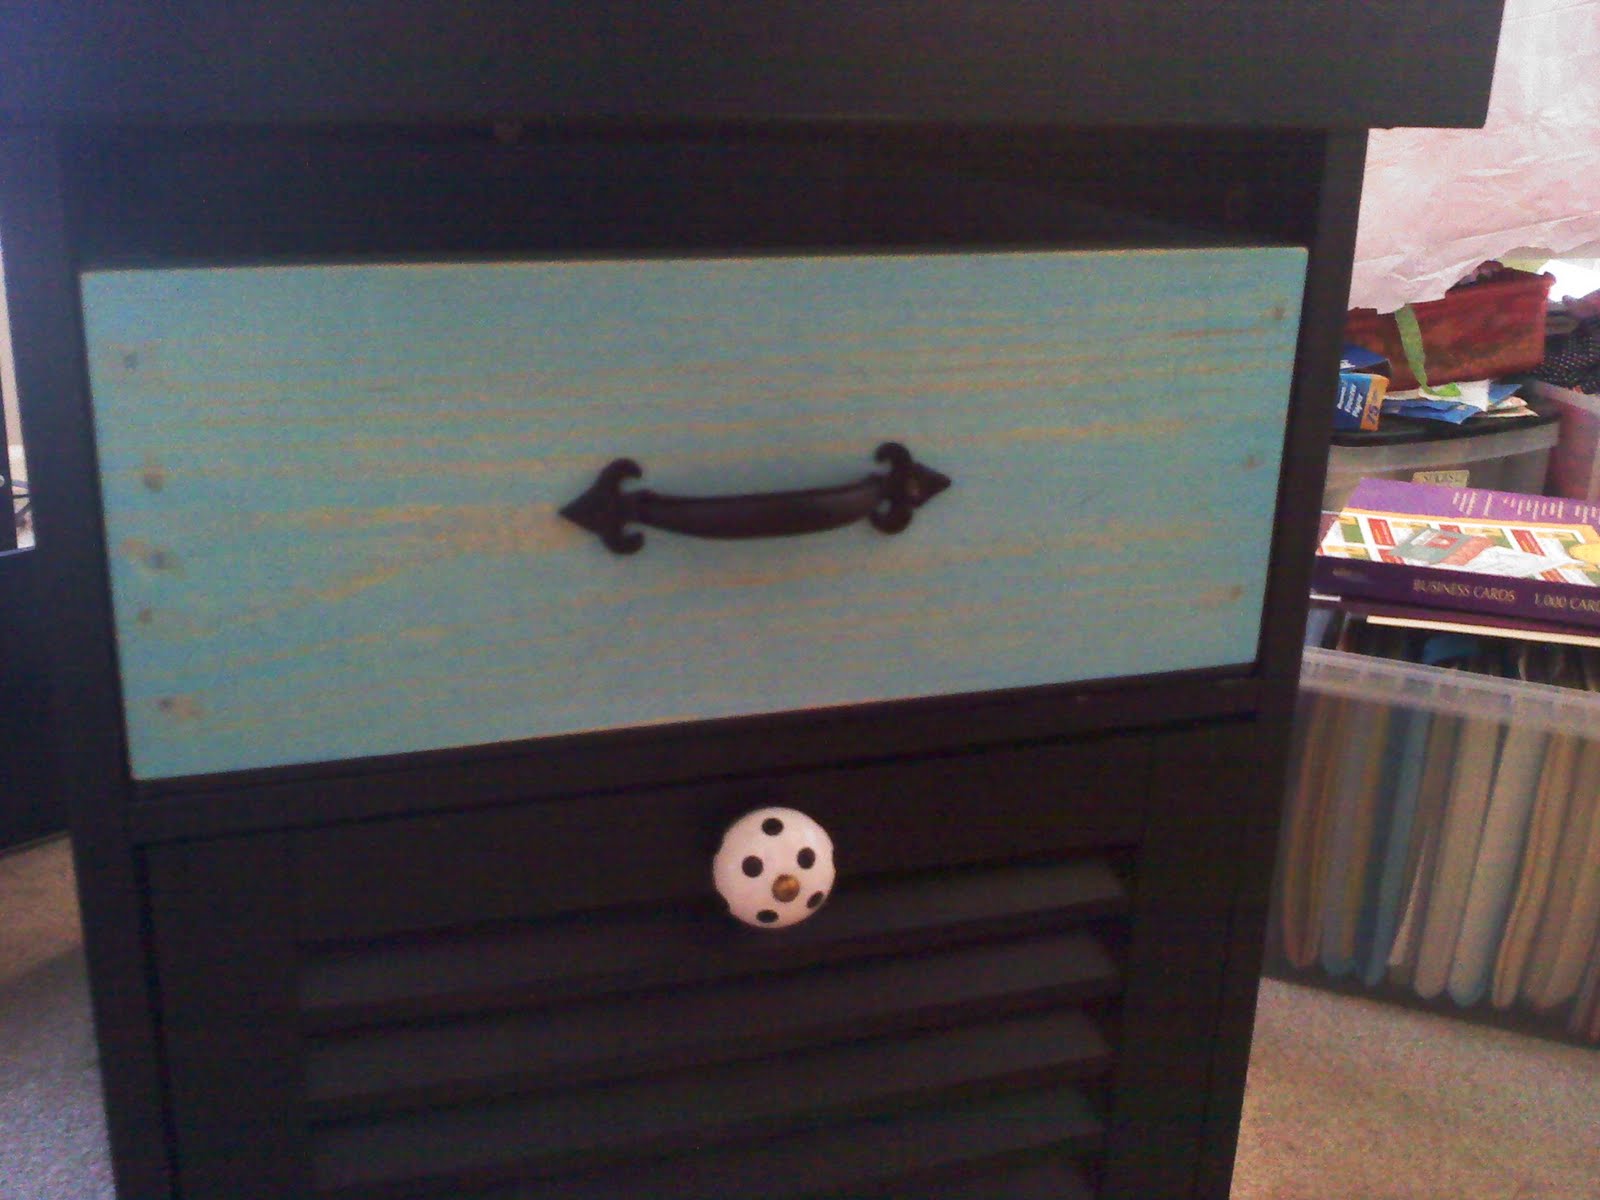
We modified the file cabinets a little...
We changed the boring silver knobs they came with to these fun polka dot ones - if you know me, you know I am a sucker for polka dots!  We also added a drawer/box to the open slot above the file drawer also with some fun hardware... 
We made these drawers ourselves with our new nail guns and compressor we bought to make our next project, that you can read about here.  The drawers/boxes come all the way out - our thought was that they would be like project boxes, to store stuff you are working on, and could take the whole box, to another location if need be to work on, and we purposely made the box a little shorter then the space so that you could just slide stuff in and out without having to "open" the drawer. The drawers are stained this beautiful pale aqua blue.

The secretaries we are building  next from plans we got from Ana at Knock off Wood will be stained the same aqua .  If you have never checked out Ana's blog, do yourself a favor and stop by!  She has FREE plans for all types of wood furniture that you can build yourself.  And she is so inspiring and empowering.  Even if you have no desire to build your own furniture, check out her blog and see all the awesome things she and her readers have built.  But be careful you may get bitten by the bug and decide to go out and buy yourself one of these...
Our latest addition...  I have to say it really is fun! 


I got this cabinet at a local thrift store for $5 about a year ago.  It has been in our family room storing dog stuff, and was painted a cream color with big burn marks on the top.  I forgot to take a before picture the other day, but believe me when I say, it needed some TLC.
A nice coat of satin black paint to match the table, and the same cute polka dot knobs and we're done!  This will actually be the printer stand, but the lamp I blogged about here looked so cute there, that I put it there for the picture!!

The red pencil/office supply organizer was on old kitchen utensil organizer I bought for $0.25.  It looked like this before a couple coats of red spray paint for plastic.  It has a lazy susan bottom too!


The last thing I have to show you today, is the chandelier that will hang above the big worktable.  Pay no attention to the fact that it is hanging crooked, the ground wire is not connected, and the plate that is suppose to be on the ceiling covering all the wires is hanging there, I was in a hurry to see how it would look...
The other thing you should know about me is that I love old blue Ball canning jars!  I pick them up at every thrift store and garage sale I find them in.  Most I have picked up for less than $1! After I bought this thrifted chandelier that I picked up for $8, none of the standard glass "shades" would fit on it so I thought... Blue Ball Jars!!  I think it was suppose to have some big glass round globe type bulb covers.

I was afraid that the Ball Jars would overheat and the glass would shatter, but it has been up for several weeks and no problems so far.  I think the fact that they have some venting in the top helps!  The fixture itself was ugly 70's shiny brass, but a coat of primer and  two of  "oil rubbed bronze" spray paint was all it took to take care of that problem. 

Imagine my surprise when I saw this one at Panache Lighting a couple weeks after I made mine...

It is a little too much for me, along with the price tag of $1300!!  Mine cost me a total of about $20 including the fixture, primer, paint, new screws, new swag chain, ball jars, and light bulbs!

Well, it is time to put another coat of poly on the other 3 drawer/boxes, so I must run.  We will post some progress of the secretary desks when we start those!

This post is being shared on DIY Day at A Soft Place to Land, Toot Your Horn Tuesday @ A Silly Little Sparrow, Talented Tuesday @ My Frugal Family,  Trash to Treasure Tuesday @ Reinvented, Get your Craft on @ Today's Creative Blog, Nifty Thrifty Tuesdays @ Costal Charm

Friday, February 12, 2010

Center Room Worktable/Partners Desk Plans - Pottery Barn Knockoff!!!

I have been working on several projects around the house since the beginning of the year.  The first is my main floor bathroom that I blogged about here, is almost complete, and I will update you on it when it is done. 

My second project is our home office.  About 3 years ago, we gave up or designated den/office so that our two girls could each have their own rooms.  We moved the office to the least used room in the house, our dining room.  We never had nice matched organized furniture in our office, which didn't really matter, because no one was ever really in there except my hubby and myself.  But now that it has been moved to one of the most visible rooms in our home, it is driving me crazy.

We want a large worktable in the middle of the room where we each have our own space, but can take over the others when needed for big projects for ourselves or when the kids have school projects that need a lot of space.  Also something that could double as a dining table (add a table cloth) when needed.  I found this at Pottery Barn Teens and love it, with the exception of four things.

 Picture from Pottery Barn Teens
  • We only needed space for 2, 
  • We want it in black,
  • The square size would not fit right in our rectangular dining room space,
  • and THE PRICE!!! - $1,599!!!
So being crafty, creative, and cheap I decided to take their idea and make it work for us.  Here is my drawing...


I know it is kind of hard to see, but I will post more pictures as it comes to life...

Here is a picture of the file cabinets we are using for the bases...


I found them, of all places, at K-mart!  For $29 each!  They are MDF, but pretty solid for "assemble it yourself furniture" and even have thick MDF backs (not the carboard tack on back that most have).  I never go to Kmart, but was at Menards the other day getting some stuff for my bathroom project and just had a whim to go across the street and see what they had, and I found these.  They were even black like we wanted!  SCORE!!!
The top will be 4'x 6'  3/4" MDF also painted black, but it will also have 2 drop leaves of each of the long sides that are 1' wide each (thus using the entire 4'x8' sheet, but not taking up too much space in the room when the extra length is not needed!!!  I get the best ideas at 11:30 pm while laying in bed trying to sleep!

I got the idea for the movable table/desk divider last night while laying in bed, and will post more on that as it comes together - it is really one of those things that is easier to describe when you see it!  But just suffice it to say it is Genius, and I already have the main piece I need to make it!

Well, I have 2 more of those file cabinets to put together, so I'd better get to it!  I hope you enjoyed this peak into my creative mind!

This post is being shared on Miss Mustard Seeds - Furniture Feature Friday! DIY Day at ASPTL, and  PB Knock-Off Party 

Thursday, February 11, 2010

Free Gift for All My Followers...

I have written my first pattern!  It is for paisleys I blogged about here and here.


This pattern can be used for a pillow or wall hanging as seen in my pictures, but also for so much more.  How about on a tote bag, or placed randomly on a simple patchwork quilt.  Maybe as appliqued quilt squares.  The possibilities are endless.  As are the color combinations that would totally change the look.

So, for all my current faithful followers (all 10 of you!) and for anyone else who becomes a follower by February 20, you can have a free PDF copy of my pattern emailed to you - just leave me a comment or send me an email message requesting it and I will email you a copy.

This pattern will be for sale in my Etsy shop also, if you have a quilting group who want to use it, or you happen to have someone ask you where you got it, please let them know where they can get it.  The cost will be minimal, but I would appreciate you not distributing it free to everyone you know.  I just wanted to offer it to you FREE OF CHARGE as a thank you for being one of my followers.

It will not be for sale in my shop until after February 20, so if you get a copy and try it out and notice any errors or items that could be explained more clearly, all I ask is that you send me a note so that I can fix it before I list it for sale.  Also, I would love to have some pictures of your original creations so that I can include them too!

Tuesday, June 9, 2009

Family Circle - October 1960


I love finding a periodical older than me! A newspaper, magazine, anything that speaks to what was going on "in the day". It is amazing how quickly some things change and how some stay the same. I found this on a recent trip to one of my favorite thrift stores.

Here are a few of the "regular features"..
.


Do you think they could get away with a column entitled that now?


The original owner of the magazine must have really liked this recipie - it is the only "damage" to this magazine - other than that it looks like it has never been read or opened. How did she cut that out so cleanly? Must have been a previous tip in the "Better Housekeeping" section...


Here are some of the "feature articles"...
Not just fashion, but fashion you can sew. There were also knitting and crochet patterns!

I'm sure I can pick up a few pointers here.

Have no fear... PMS was alive and well - they just didn't have a name for it!

What cracks me up about this is that if you change the word encyclopedia to internet or wikipedia the very same scenario probably happens at most homes today - It is almost exactly how it goes at our house, only I have to admit - I would be the "father" in this story. If you click on the picture below and see the full size picture, I think you can read the first page of this article - it is quite funny.

And here is the "monthly short story", by the up and coming author - Mary Higgins Clark...


FIVE DAYS in the hospital after a baby!!!

And to boot, the story talks about her waking up to find out what she had!! Those were the days! And can someone explain why we don't still do it this way?

When I had my first in 1995, she had broken my rib which sent me to the hospital 3 weeks early due to the excruciating pain. (which they did not figure out until 6 weeks post pardum and it was still hurting and they took x-rays) So because I was in so much pain they couldn't send me home so they decided to induced me 3 weeks early, they had to do an emergency c-secction becasue her heart kept skipping beats with every contraction, my staples got infected and I was spiking a 103 fever, because she was small, they brought her to me every 2 hours to nurse, so between the pain and the nursing, sleep was non-existant. But even through all of that I was forced to leave 48 hours after delivery. So at 8:45 pm I was wheeled out of the hospital and sent on my merry sleep deprived way with my 5 lb 12 oz. - 3 week early newborn, a broken rib, c-section with infected staples.

If I had delivered after 9 pm I would have been able to stay until the morning - sometimes I think they did the c-section to ensure I delivered before 9pm!!

Oh well, it all worked out OK!! Here she is 14 years later right before her 8th grade graduation... Oh, they do grow so fast!!!


There are many more things in the magazine that you would enjoy, but I would be here all day taking pictures and uploading them. I will show you some of the ads in another post - they too are quite funny!

Wednesday, June 3, 2009

Peacock Chenille Bedspread

I picked up this bedspread this weekend. I think it is a full size. I wasn't even sure what the design was on it when I picked it up from a school rummage sale table.

I just knew it was chenille (which I love)and very colorful (always a plus and unsusal for chenille).

My original thought when I grabbed it was to cut it up and use it in quilts. I have gotten several "cutter" chenille bedspreads at garage sales before.

But it is vintage cotton chenille and is in absolutely fantastic condition. The colors are so bright, and the fabric and chenille itself are so SOFT!!!

I can't bring myself to cut it - it would be a shame and a waste of a beautiful piece of the past.

But I have no place to use it...

So I think I am going to try to sell it in my Etsy Shop. The only question is how much should I charge. I can not find anything remotely like it anywhere to get a reference price. The closest thing I could find was this one (which I don't think is nearly as beautiful). Did you look at what they are asking for it?!? In this economy, who in their right mind pays $285 for an old bedspread? Obviously no one, because it is still for sale! Oh, well, if you have any ideas about what I should charge for it or if you are interested in buying it please let me know... I have an idea in my head of a fair price, but just curious what you other bloggers think.