We (hubby and I) have been working on re-doing our dining room/home office for the past month or so. As with every home improvement project we undertake - it is taking longer than we had hoped for or anticipated.
But wanted to show you some of the things we have accomplished in this time... (but please ignore all the mess in the background of these pictures... most if not all of what you can see will be gone when the room is done. Also ignore the poor quality of the pictures - I had to use my cell to take the pictures - couldn't find my real camera right now!!!)...
This is the worktable for the center of the room. It will double as a dining table when needed for that purpose (about 3 times a year if we're lucky!). The size is a generous 3' wide by 7 ' long! The bases are 4 file cabinets we bought and assembled that I blogged about
here. The design for this worktable has changed slightly, but the concept is still the same. The table top is so solid - it has (5) 2" x 4"'s running the length of the table as support, and the apron/trim piece we added to hide all that allows the top to sit over the file cabinet bases so it doesn't slide off and keeps the 2 "back to back" file cabinets together.
We modified the file cabinets a little...
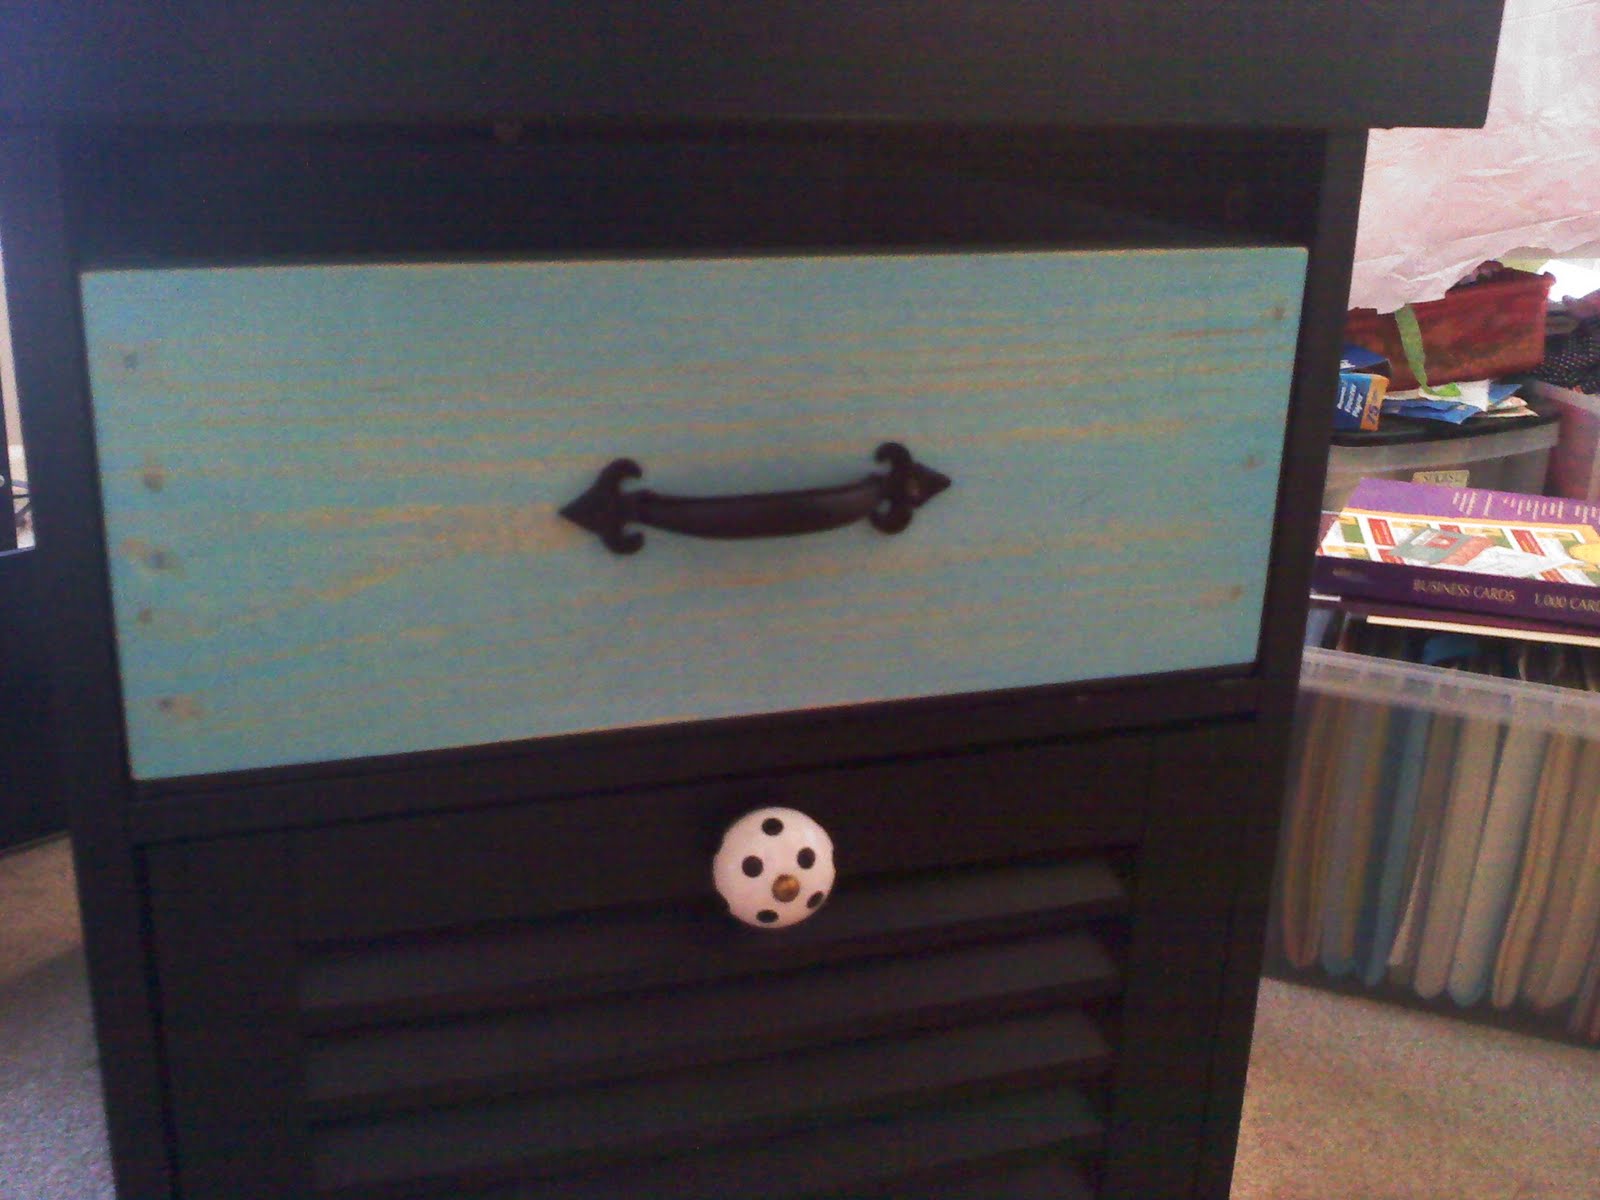
We changed the boring silver knobs they came with to these fun polka dot ones - if you know me, you know I am a sucker for polka dots! We also added a drawer/box to the open slot above the file drawer also with some fun hardware...
We made these drawers ourselves with our new nail guns and compressor we bought to make our next project, that you can read about
here. The drawers/boxes come all the way out - our thought was that they would be like project boxes, to store stuff you are working on, and could take the whole box, to another location if need be to work on, and we purposely made the box a little shorter then the space so that you could just slide stuff in and out without having to "open" the drawer. The drawers are stained this beautiful pale aqua blue.
The
secretaries we are building next from plans we got from
Ana at Knock off Wood will be stained the same aqua . If you have never checked out Ana's blog, do yourself a favor and stop by! She has FREE plans for all types of wood furniture that you can build yourself. And she is so inspiring and empowering. Even if you have no desire to build your own furniture, check out her blog and see all the awesome things she and her readers have built. But be careful you may get bitten by the bug and decide to go out and buy yourself one of these...
Our latest addition... I have to say it really is fun!
I got this cabinet at a local thrift store for $5 about a year ago. It has been in our family room storing dog stuff, and was painted a cream color with big burn marks on the top. I forgot to take a before picture the other day, but believe me when I say, it needed some TLC.
A nice coat of satin black paint to match the table, and the same cute polka dot knobs and we're done! This will actually be the printer stand, but the lamp I blogged about
here looked so cute there, that I put it there for the picture!!
The red pencil/office supply organizer was on old kitchen utensil organizer I bought for $0.25. It looked like this before a couple coats of red spray paint for plastic. It has a lazy susan bottom too!
The last thing I have to show you today, is the chandelier that will hang above the big worktable. Pay no attention to the fact that it is hanging crooked, the ground wire is not connected, and the plate that is suppose to be on the ceiling covering all the wires is hanging there, I was in a hurry to see how it would look...
The other thing you should know about me is that I
love old blue Ball canning jars! I pick them up at every thrift store and garage sale I find them in. Most I have picked up for less than $1! After I bought this thrifted chandelier that I picked up for $8, none of the standard glass "shades" would fit on it so I thought... Blue Ball Jars!! I think it was suppose to have some big glass round globe type bulb covers.
I was afraid that the Ball Jars would overheat and the glass would shatter, but it has been up for several weeks and no problems so far. I think the fact that they have some venting in the top helps! The fixture itself was ugly 70's shiny brass, but a coat of primer and two of "oil rubbed bronze" spray paint was all it took to take care of that problem.
Imagine my surprise when I saw this one at
Panache Lighting a couple weeks after I made mine...
It is a little too much for me, along with the price tag of
$1300!! Mine cost me a total of about $20 including the fixture, primer, paint, new screws, new swag chain, ball jars, and light bulbs!
Well, it is time to put another coat of poly on the other 3 drawer/boxes, so I must run. We will post some progress of the secretary desks when we start those!
This post is being shared on
DIY Day at A Soft Place to Land,
Toot Your Horn Tuesday @ A Silly Little Sparrow,
Talented Tuesday @ My Frugal Family,
Trash to Treasure Tuesday @ Reinvented,
Get your Craft on @ Today's Creative Blog,
Nifty Thrifty Tuesdays @ Costal Charm